Paging One Recipient
A page can be sent to one person, function, the members of one message group, or the individuals currently on-call for one on-call group by clicking the paging icon next to the selected name.
NOTE: You can also use the Quick Page feature to page one person. For more information, please refer to Paging with the Quick Page Feature.
A page can be sent to one individual or group by creating a recipient list as well. For more information about sending a page to a recipient list, please refer to Sending a Page to Multiple Recipients.
Reviewing Paging Restrictions
If a person cannot receive a page when the page is sent, the page is sent and is stored as a message with an operator. The page recipient can also retrieve the message from their Personal Profile screen.
A recipient may have restrictions that cannot enable them to receive a page, such as a page block or referral exception, or require a password if the recipient is using RAP (Restricted Access Paging). For these situations, message and password dialogs display. For examples and more information, please refer to Paging Restrictions.
Paging using the Smart Web Message Priority Feature
If your system has been configured to use the message priority feature and if the person logged in to Smart Web is allowed to use this feature, the Priority list box displays in the Compose a Message screen when sending a page. The user is able to select a message priority option which is used to determine the order for the message in the paging queue. If the paging device to which the page is going to be sent is registered with Spok Mobile the message priority also determines the ring tone that is played on the device when the message is received. For more information about this feature, please refer to Assigning a Message Priority to a Page.
1. Access Smart Web.
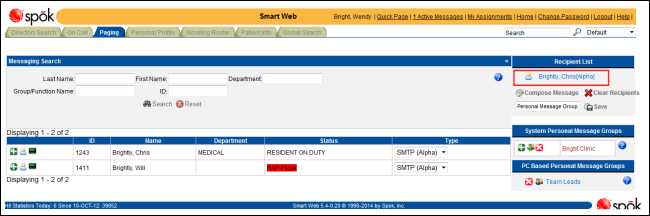
2. Choose the Paging tab to display the Paging screen.
3. Search for the name of the individual or group to which a page should be sent.
4. Click on the paging icon next to the name of the individual or group to be paged. The name displays in the Recipient List section, and any restrictions to paging that individual or group are displayed in the Status field.
For example, if an individual has a Restricted Access Pager, a RAP password screen displays, or if an individual has a currently scheduled REFERRAL or PAGE BLOCK exception, a message dialog displays stating that a page cannot be received but a message will be stored.
5. Click on the Compose a Message button. Depending on whether the selected individual, the individuals in the message group, or the on-call group member(s) currently on call can receive a page or a message, the Compose a Message screen for either the page or the message displays.
For examples of each type of paging or message screen, please refer to Page Type Examples: Numeric, Alphanumeric, and Message Only.
6. Click the Send Message button to send the page or message. A confirmation dialog displays.
NOTE: Your system may be configured to display a different message than the default message shown below, or configured so that a confirmation dialog does not display at all.
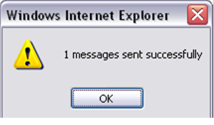
7. Click the OK button to close the confirmation dialog.