Viewing Today’s On-Call Assignments
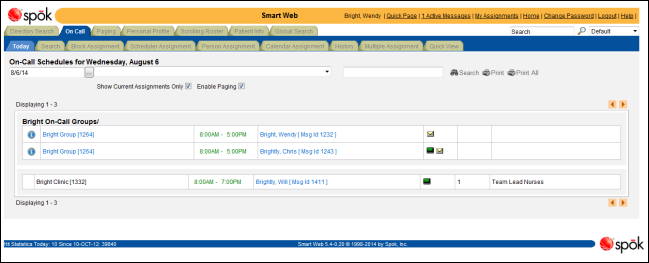
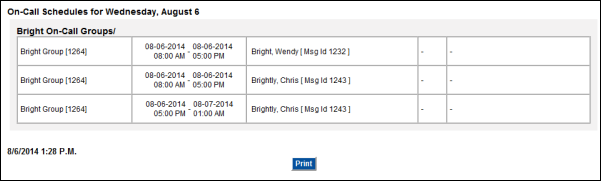
The active on-call assignments for one day can be reviewed in the Today screen. The Today screen shows the on-call assignments for one specific day, which is the current day by default. A different date can be selected for display, and you can also choose a specific on-call group to display.
Note that current on-call assignments display in green and future assignments display in black. A blue arrow displays in a time range if the assignment time spans the day before the selected date or the next date.
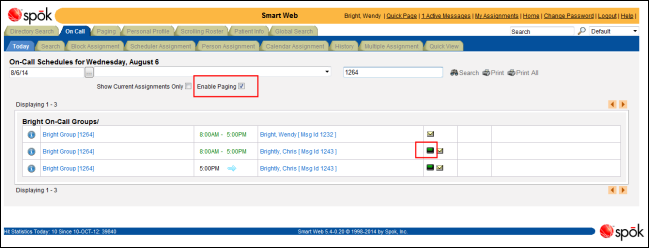
You can also choose to page from the Today screen by selecting the Enable Paging option in this screen. When this option is selected, the paging icon displays.
1. Choose the On-Call tab.
2. Choose the Today tab to display the Today screen. By default, all active on-call assignments for the current day are displayed.
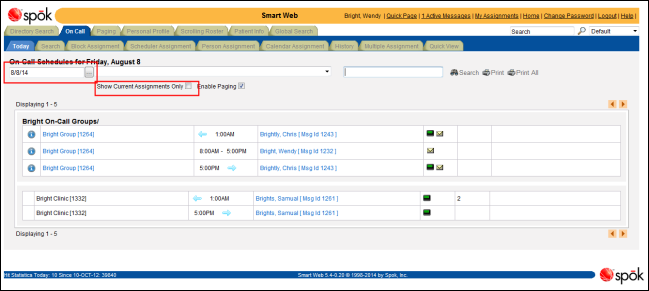
3. You can display the on-call assignments for a different date.
a. Manually enter a new date in the date field. You can also click the calendar button next to the date field to select a date from a calendar.
b. De-select the Show Current Assignments Only option. The screen is updated to show the assignments for the new date.
4. You can limit the assignments by choosing an on-call group from the list box and clicking the Search icon. Only the assignments associated with the selected group are displayed.

5. You can search for a specific on-call group by name or messaging ID using the on-call search field. You can enter a partial or complete name or ID string.
NOTE: If entries are made in both the list box and the search field, the search returns only those assignments that match both entries.
a. Enter the search string in the on-call group search field.
b. Click the Search button. The screen is updated and displays the on-call assignments that match the search string.

6. Click the pager icon for the on-call group to page the person currently on-call.
NOTE: The Enable Paging option must be selected to ensure that the paging icons can display.
For information about the paging screens, please refer to Paging from Other Smart Web Screens.
7. The list of assignments can be printed. You can click the Print icon to print what is currently displaying on the screen, or click the Print All icon to print all of the assignments.
a. Click the desired printer icon.

b. A new browser window opens and displays a printable version of the on-call assignment list.
c. Click the Print button. The standard Print dialog displays.
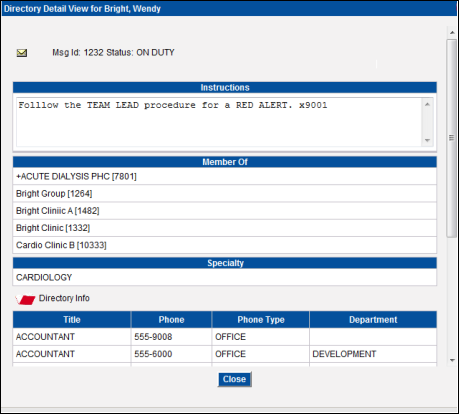
8. Directory information about an individual can be displayed by clicking on a person or function name. Click the Close button to close the screen.