Creating an On-Call Assignment Using the Same Shift Button
The Same Shift button enables you to create a new shift that is based on an existing shift. The new shift has the same start and end dates and times as the selected shift.
1. Access Smart Web.
2. Choose the On-Call tab.
3. Choose the Scheduler Assignment tab, and log in if you have not already logged in. Search for the on-call group to which an assignment should be added. For instructions on how to search for an assignment, please refer to Searching for Current On-Call Assignments for an On-Call Group.
4. Select the shift on which the new shift should be based. The background for the selected shift displays in yellow.
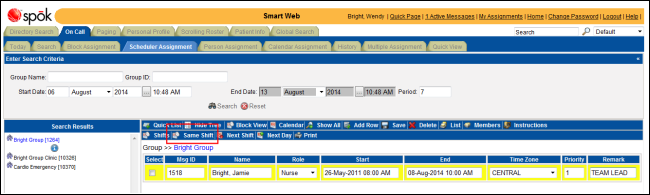
5. Click the Same Shift button. A new row is added to the list of on-call assignments. The individual assignment is blank.
6. From the Role list box, select a role that describes the person’s job function. The list of options is derived from the roles assigned to the on-call group.
NOTE: This feature is configurable and may not be available in your system.
7. Specify the individual to whom the shift should be assigned. You can manually enter a messaging ID or name, or you can click the List button to select a member of the on-call group or search for a non-member. For information about how to use the List button, please refer to Using the List Button.
8. Select a time zone from the Time Zone list box.
9. Enter a priority in the Priority field. The priority is used when more than one individual is on-call for the same time. The person or function with the highest priority is paged. The highest priority is “1”. If more than one individual is assigned to the same time but priorities are not assigned, the first person or function in the list is paged.
10. Enter any comments or notes about the shift in the Remark field.
11. Click the Save button to save the new assignments. A confirmation message displays.

12. Click the OK button to close the message dialog box and display the updated screen.